As a mini-kit, there is not much of a story to tell about building Woody Joe’s Hobikisen kit. I’ve given an out of the box review already and beyond that, it’s just a matter of several hours spent on building the model over the course of about 10 days. As I mentioned before, I got this and the Utasebune kit through Zootoyz as soon as I found out that the kits were released.
Starting the build was easy and I got through the first half of the 12-page instruction book in a just a couple hours. As with my Higaki Kaisen kit build, I chose to treat the beautifully aromatic Hinoki wood with a wood dye mixture using TransTint wood dyes. A bottle of this stuff is pretty pricey, but it goes a long ways. I have three colors I mixed for the Higaki Kaisen and I used a similar mixture for the Hobikisen.
 Hinoki is pretty brittle when dry, so don’t try to bend it without wetting it first. It actually doesn’t take much soaking in order for it to become flexible. You can pretty much just dampen the wood.
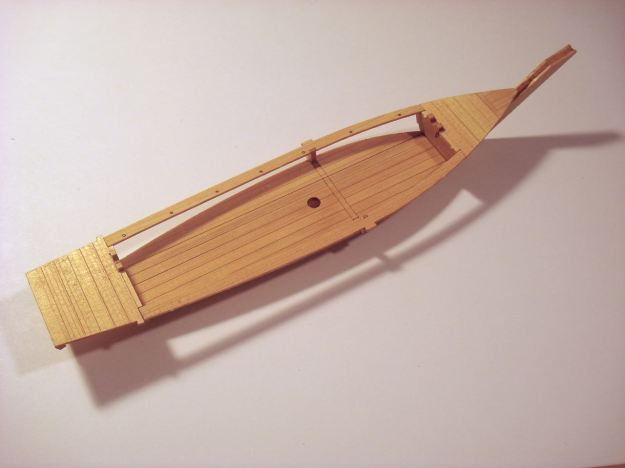
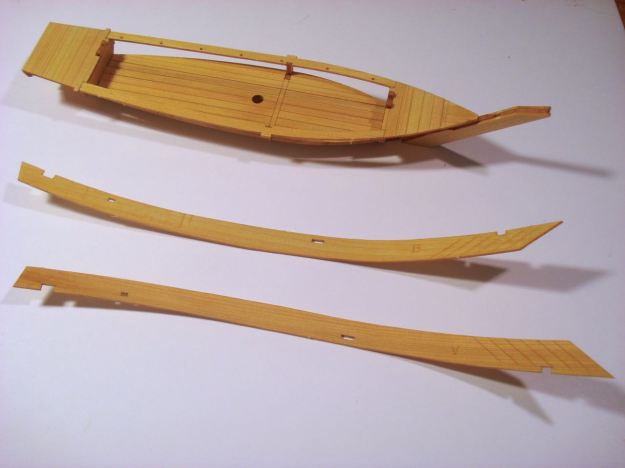
The laser cut parts don’t take much effort to remove from the sheets. The wood is very thin for this kit. I didn’t measure it, but it can’t be more than 1/32″ thick. In any case, it’s best to cut the wood free of the sheets using a hobby knife.
There aren’t a lot of pieces, so there’s not much chance of losing track of which piece is which. But, some of the laser cut pieces have an identifying letter engraved on them, more or less where they won’t be seen. Actually, one of the bulkhead pieces actually has its part identifier “C” in a very visible location. It’s not very noticeable, but you might want to sand the piece down a little to get rid of the marking. Probably good to wet the piece to let the wood swell and reduce the letter’s visibility first. Then sand it after it’s dry.

Everything is very straight forward. It is a simple build. I actually had the hardest time trying NOT to add additional details to the model. It’s supposed to be a quick build “weekend” kind of kit, after all. Still, I had to monkey around with it, though there is more I could certainly have done.
The hardest part of the build was the sail. This requires embedding brass wire along the each edge and the the center. The wire in the center has to be covered over by a strip of spare sail cloth, so be careful when you cut the sail out to leave long leftover strips intact.
Note that on real Hobikisen, the vertical panels of the sail are separate and the when filled with wind, the real sail has a ruffled pattern to it. To get some degree of this look, the top and bottom edges are formed in a wave pattern. The instruction have you bend the sail edge using a small battery (like a AA cell), but I just use fingers to do it.
As for the rigging lines, there is enough to get the model done, but there’s not a lot to spare, so you’ll want to do your best to use the supplied line efficiently.
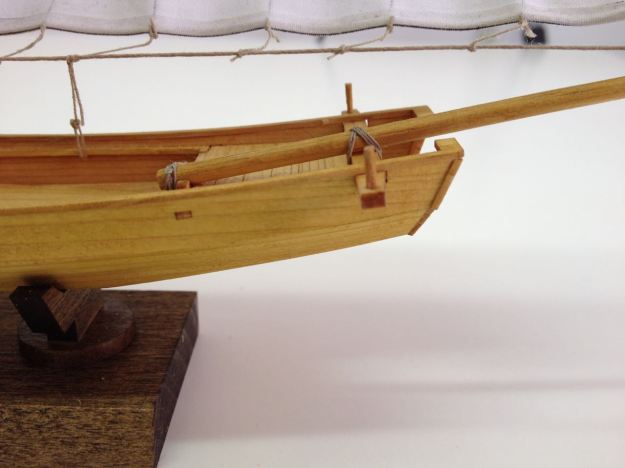
Now, as I mentioned, it’s hard for me to build a model straight out of the box without messing with it and adding or changing details. The first thing I ended up doing was to add little wood ledges under the inboard ends of the outriggers, so I could lash the outriggers down. I got the idea from looking at photos of Hobikisen on the Internet.
There are plenty of photos of the modern day Hobikisen on the Internet which, as far as I understand, operate for sightseers to observe on Lake Kasumigaura, Northeast of Tokyo. There are some beautiful photos on the Visit Ibaraki Japan website, to which the nice folks at Woody Joe were kind enough to send me the link.
Notice in the above photos of the finished model the lashings I added to the outrigger. I also added pins into the provided holes in the stern cross timber.
Next, I noticed that all Hobikisen I found in photos rigged their sails to starboard. The kit has them rigged to port for some reason. I decided this was an easy and safe change, so I went ahead with it. The only problem there is that the kit provides holes on the port side gunwale for securing the sheets of the sail.
As it was, the last change I made with in the way the sheets were secured. On the kit, the gunwale on the port side has holes cut in it, and most of the sheet lines are secured through those holes. On photos of the Hobikisen on the Internet, the sheets were all tied off to a rope that runs between the ends of the outriggers. This is very similar to how the mainsail is secured on the Higaki Kaisen. So, it seemed to be another sensible change.
Given that, I trimmed the width of the gunwales down. I did this mostly because it was easier than filling the laser cut holes in the port side gunwales, and also because I’d never seen these internal rails on a traditional Japanese boat. Without much research to go on, I wasn’t completely at ease with making the changes. But, they seemed to be reasonable and correct as far as I could determine. I could very well be wrong, but not too many people will know if I’m wrong, including myself.
The model was mounted on the provided stand, but the sail makes the model want to fall over onto its starboard side. So, I drilled a pair of 1/16″ holes in the bottom for mounting pins. I fixed the pins into the stand so I could remove the model without having pins sticking out of it.
One advantage to this was that I could also set up my Amati Keel Clamper to hold a pair of 1/16″ pins at the proper distance apart and mount the model on it for rigging.
The model was completed in a short time and it was a fun and interesting experience, and I learned something about Hobikisen in the process.
The model kit included three silhouette figures of Japanese fisherman, but I chose not to use them. The fishing technique that made these boats unique was developed early in the Meiji Era around the 1880s. Traditional style boats were in use then, but the figures are modern style figures and you can make out the bill of their baseball caps. So, I decided not to use them, even though they’d provide some clue to the model’s scale.
One thing I could have added, but chose not to, were the rectangular caps that fit over the mortises cut along the edge of the main planks for nails. They’d be made from copper and should be easy enough to cut from adhesive backed copper tape I have on hand. But, if I do that, there are actually a few additional places that were probably covered with a protective copper cap that should be done as well.
For now, I’ll leave it as is. It’s a neat model kit and it’s nice to finish up a quick project in between the big ones. Ω


Hi Claire, I have been searching the Zoioitoyz for the 2 new Woody Joe mini kits, they are still not posted and can not get currency converter, what are the sizes and how much are they with out shipping. Thanks Don
Hi Don,
They’re definitely there. I’ve seen them several times, ever since he posted them in response to your request. Info’s all there including pricing, length, photos, etc. They’re at the bottom of the 3rd page of Woody Joe ship model kits. Here’s a direct link to the page they’re on. See if that helps: http://zootoyz.jp/contents/en-us/d67_Woody_JOE_Wooden_Sailing_Ship_Model_02.html
Also, all your questions I think are covered in the kit review I posted here: https://shipmodeler.wordpress.com/2014/10/31/two-new-mini-kits-from-woody-joe-hobikisen-and-utasebune/
Clare
Reblogged this on Wasen Modeler and commented:
The Hobikisen is a unique type of side trawling fishing boat that operated on Lake Kasumigaura, northwest of Tokyo. As with most mini-kits produced, Woody Joe’s mini-hobikisen isn’t particularly detailed , but it makes for a really nice looking model that’s simple enough to build that you could do it on a weekend, depending on how nicely you finish it.
You can buy one from the online seller Zootoyz here: http://zootoyz.jp/contents/en-us/p1681_Woody_JOE__Mini_Series_HOBIKI-BUNE___Wooden_Sailing_Ship_Model.html
If you really like mini-kits, you should also check out Woody Joe’s mini-yakatabune, house boat, and their mini-utasebune, another type of side trawling fishing boat used on Japan’s norther main island of Hokkaido. Both are also available at http://zootoyz.jp